
A few days ago I read a tweet from someone who recounted their experience with Pi-hole, which brands itself as “A black hole for Internet advertisements”. My curiosity being piqued, I read up some more, and I liked what I read.
I’ve run ad blocking extensions in my browsers for years, and it’s made using the web bearable. But if you think about it, what those blockers are doing is simply preventing those ads from displaying; they are still fetched from the internet, using up bandwidth, which slows down your browsing.
Pi-hole takes a different approach, acting as the DNS server for your network. When a request is received, it compares it to a curated list of domains known to serve advertisements and track users, and if it is in that list, instead of forwarding the request to that domain, it forwards it to its own built-in web server, and returns a blank page. In other words, no internet traffic at all is generated!
I had an extra Raspberry Pi on hand, so I figured that I’d play around with it this past weekend. I installed the latest Raspbian operating system on it, and followed the simple instructions to git clone the Pi-hole source code and install it. There are several other pages I found detailing the steps, but as it’s pretty straightforward I didn’t feel that I had anything to add by creating yet another step-by-step guide.
Note that you don’t have to use a Raspberry Pi to run Pi-hole; you could run it on just about any Linux system. There is even a Docker image you can pull and run, so you have plenty of options if you don’t have any Raspberry Pis on hand. If you do want to pick up a Pi or three, I recommend PiShop.us. They have the raw components as well as full kits for the Pi, and also lots of other maker-oriented products.
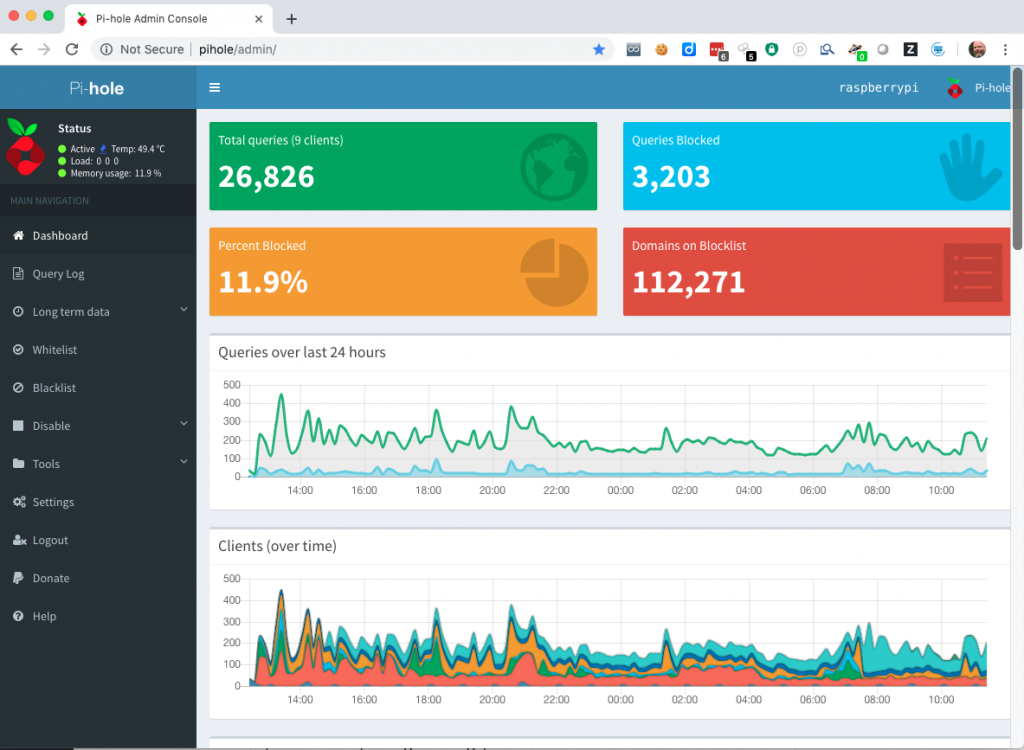
I use the Google Wifi mesh system in my house, so I was a little concerned that getting it to work with the Pi-hole DNS might be tricky, as the Google Wifi system is rather limited in your ability to customize it. I configured the Raspberry Pi to only use the wired ethernet connection, and plugged that into the output jack of the Google Wifi unit. I set the Google Wifi app to give that Raspberry Pi a static IP address. So far, so good. I first tested it by changing my laptop’s DNS to point to the Pi-hole’s address, and loaded a few web pages. The Pi-hole comes with an admin web server that allows you to not only configure things, but also see real-time stats of the traffic that it’s handling.
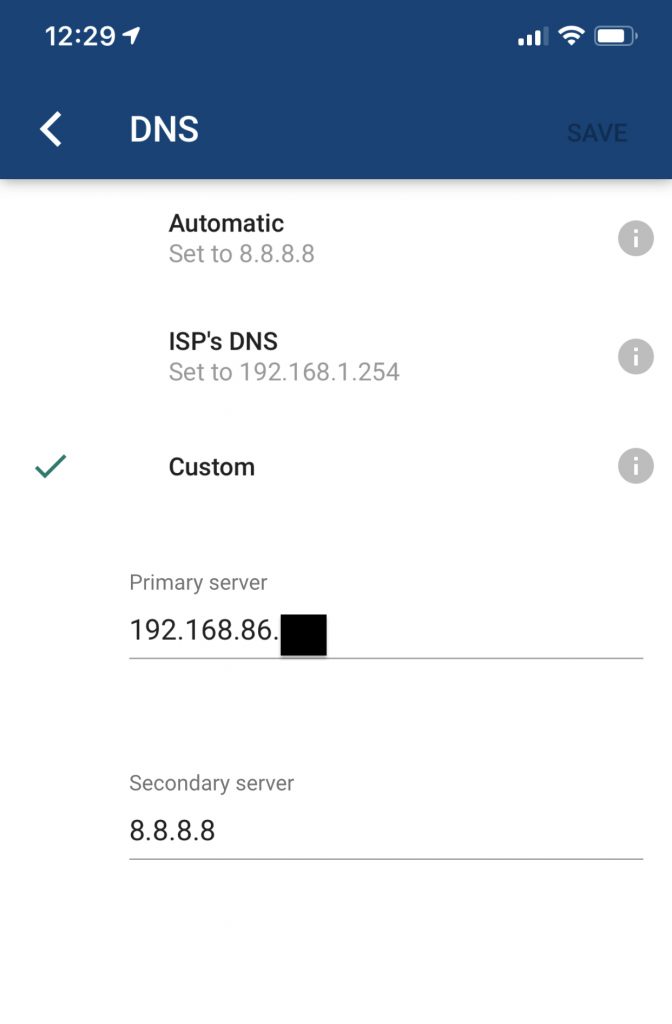
Once I saw that it was indeed working and working well, I opened the Google Wifi app to the Settings tab, and then opened the Network and General button. That gives you a page with several options; the one you need is Advanced Networking. The top option on that screen is DNS; open that and change it from the default of Automatic to Custom. Set the Primary server to the IP address of the Raspberry Pi running Pi-hole, and the secondary address to some other server (I used Google’s default of 8.8.8.8). Save that, and you’re in business! (see photo below) Now every device on your local network will experience faster, cleaner internet browsing free of ads!
If you don’t have a central device acting as a router that you can configure, you’ll have to change each device’s settings to use the Pi-hole for its DNS. A little more work, but once it’s done, it’s done.
As an added bonus, once you’re using Pi-hole, you can disable your browser’s ad blocking software, as it is pretty much redundant. Since I’ve disabled those extensions, I haven’t gotten any of those annoying “Please turn off your ad blocker” popups when I go to some sites. I’m sure that there are some techniques that might flag Pi-hole, but so far I haven’t hit any.
I’ve only been using it for a few days now, but the results were instantly noticeable. The percentage of blocked requests varies slightly, but has typically been around 12%. The Pi-hole project is entirely user-supported, and I was more than happy to donate even after using it for a short time.